Welcome to my grand re-opening!
Well, howdy again. It's been almost two years since I created this site, published 3 posts (including the one about how I built it), and then completely abandoned it. After that, andrew-nguyen.com has sadly been neglected and collecting dust.
Expand to read about why I killed the first version of my site.
Why did I keep paying to host it instead of just taking it down? Honestly, I'm not sure. I probably didn't want to kill something that I built (even if it was costing me to keep it alive), and maybe I was hoping to eventually find the motivation to sit down and work on it again.
I was pretty proud of my site's web app when I first made it. I learned front-end design & development, Node.js, Express, and MongoDB to put it together, and I was so enthusiastic that I even built my own admin console and Content Management System (CMS). When I thought it was "good enough" and ready for showtime, I set it up on a Google Cloud VM to show off my work to the world.
But it kind of sucked, to be honest. Specifically, I didn't enjoy using my homemade CMS. Sure, it worked, but it wasn't great and left a lot to be desired. Writing a text post was fine, but I needed to go through an entire workaround process if I wanted to include pictures or videos in the post. I already struggle with getting myself to write, so having to deal with my crappy CMS just made me avoid it even more.
My CMS also sat behind a login page, but you'd see this beautiful sight since I never got around to obtaining a certificate:
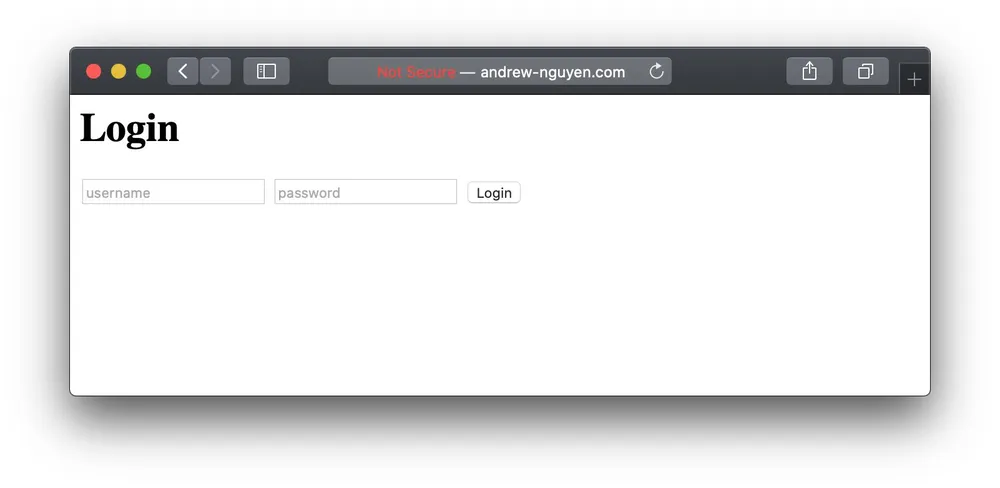 Who doesn't love an insecure login page?
Eventually (like most people do with their projects), I stepped away for a while and focused on other things. I would come back from time to time, but I'd realize that I had forgotten some things (like how certain parts of my web app worked, or the workaround to add pictures to a post, or even my password to actually get into the management console) and didn't feel like spending the time to relearn it.
So I never posted to it and it just sat there.
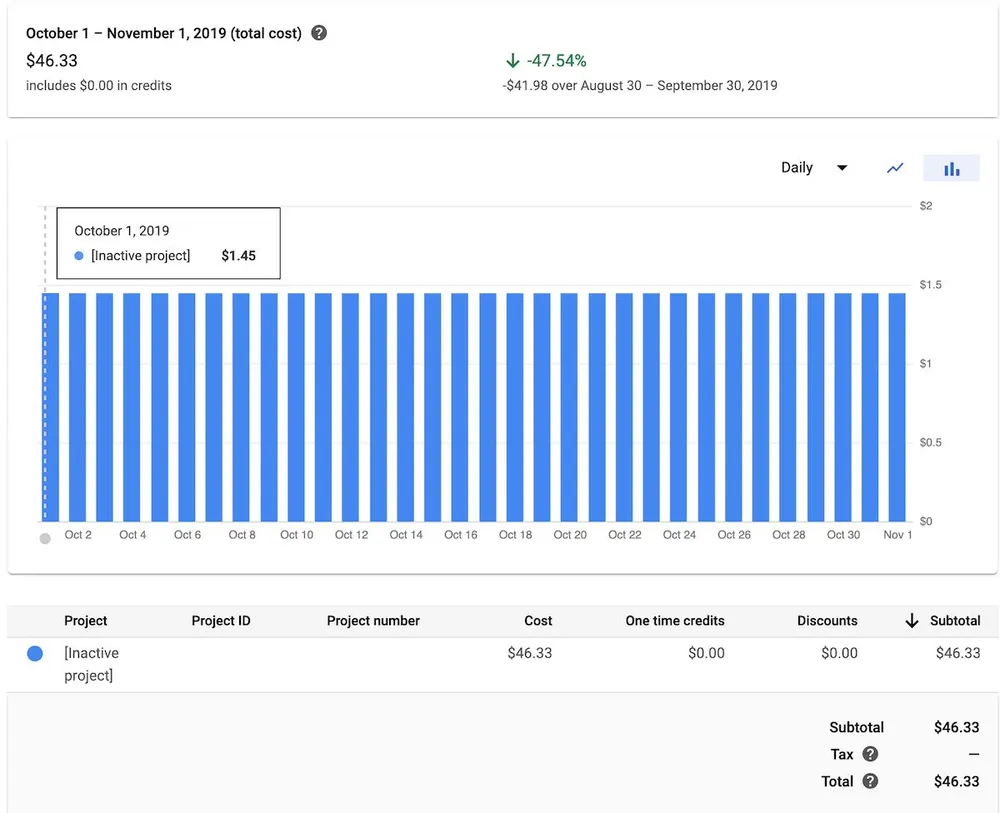
Then there's also the issue of cost. Originally, my application was running on a free Google Cloud VM, but after about a year I started getting charged about $45/month to keep a dead website alive.
I looked for cheaper options, and I eventually moved my Node application to a Heroku Dyno, which was $7/month.

So my webserver was still able to run 24/7 for about 85% of the cost. This was great, but when nobody was making requests (which is 99.99999% of the time), my application was still sitting there and using resources that I had to pay for.
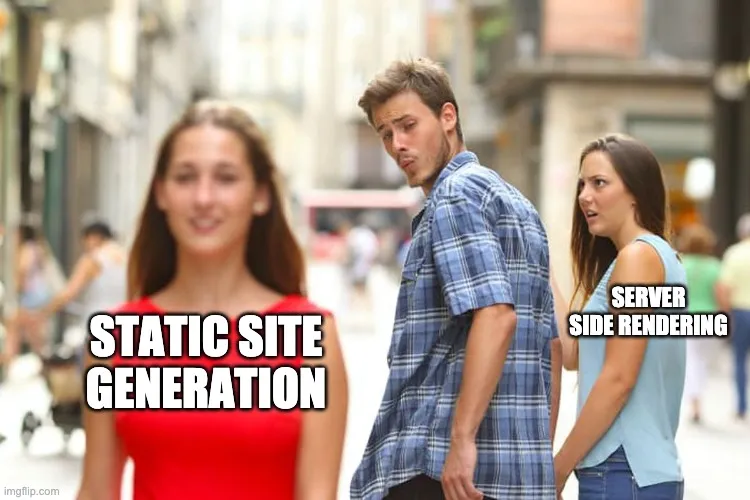
The "JAMStack"
Then I learned about Static Site Generators and the JAMStack (Javascript, APIs, & Markdown).
Goodbye, Express
Rather than needing to manage an application that serves requests and dynamically constructs pages, why not just generate the pages once and then let someone else serve them for me? This way, I don't need to deal with a back-end anymore, and I can just focus on the front-end and the actual content of my site.
I guess this is similar to what folks call "serverless". Yes, your static content is still being served by a "server", but now you don't have to manage that web server anymore.
Markdown Management
Another plus of using a Static Site Generator is being able to write all of your posts using Markdown. It's simple, straightforward, and much better than having to use the my crappy CMS.
Price
Oh, and I forgot to mention that it's dirt cheap.

One of my "2020 Quarantine Projects" was to rebuild my website. I completely rebuilt my site from the ground up (again). But this time, instead of writing another web application, I decided to try out the "JAMStack" and statically generate my site with GatsbyJS.
In this post, I'd like to share some thoughts about my new site, such as my experience with building on Gatsby & React, creating the new design, and deploying it on Netlify.
Choosing a Static Site Generator
When I was looking for a static site generator, Gatsby, Hugo, and Jekyll seemed like the most popular ones at the time (but there are plenty of others).

However, each of them had a different ecosystem (Gatsby uses React and GraphQL, Hugo is built with Go, and Jekyll is written in Ruby). I was unfamiliar with all of them, so picking a generator was also an investment in learning a new ecosystem as well.
Although Jekyll seemed to be the oldest one with a long history of community involvement, I eliminated it because I wasn't super interested in learning Ruby. However, I had a hard time deciding between Go and React. Go has been on my list of languages to learn, but I've also been wanting to learn how to build better and more interactive web applications with something like React.
In terms of the SSGs themselves, there's not a clear winner. Both Gatsby and Hugo seem to have an equal amount of community activity and support. They also have their own unique advantages. For example, Hugo can pump out builds very quickly, but Gatsby seems to be quite extensible with their plugin system. You can find plenty of other posts with detailed comparisons between these two, so I won't bother.
In the end, I picked Gatsby because I felt like I'd be able to learn it (and React) fairly quickly. I was already familiar with JavaScript and NodeJS, and I figured that learning a framework would be easier than learning a new language. React might be overkill for a static blog site, but learning it now could give me the chops to build something more complex in the future. I guess Golang will just have to wait for another project.
Front-End: Learning React & Building with Gatsby
There are a ton of resources online that you can use to learn React and Gatsby, but I'd say that their own docs are a great place to start. I even found a 5 hour YouTube tutorial video on Gatsby that ended up pretty much following the official tutorial that GastbyJS has on their site.
Here are some thoughts that I had while learning React & Gatsby.
React's Components & Everything in JS
One of the things I personally liked with using React was how you can build your entire front-end in your JavaScript files. I felt like this (along with their Component system) allowed me to easily organize my units logically and achieve a higher level of complexity than I'd be able to with plain HTML, CSS, & JS.
Tightly Coupled HTML, JS, & CSS
Although I understand the argument for the separation of content/structure, styling, and logic into HTML, CSS, & JS files respectively, the actual contents of these files are always tightly coupled. Class names and IDs are spread throughout these files, and you have to filter through all of them to find the ones you're actually looking for. You can't make a change in one file without understanding the contents of the others, and things can quickly get messy. As a result, it can become difficult to identify and comprehend the different relationships within these files with a quick glance.
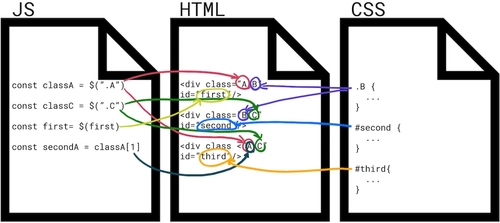 Messy, amirite?
An alternative is to group the styling and behaviors with the content they're related to, and then structure these "Components" together in a hierarchy to define your webpage. With this method, everything you'd want to know about a component could be described and defined in a single file.
Note: I'm not a front-end expert, so I'm not claiming this to be the best way to do things. I'm learning as I go, and like most things in software engineering, this is just one way of doing things. Let me know if you have another method that works better for you!
No HTML
With React, you don't even have to write HTML. Instead, you use JavaScript to build Components and write "JSX" in order to define their relative structure. With this, the React library itself will take care of generating all the elements that you want to render in the browser. As a result, it becomes really simple to modify and make updates to your pages.
CSS-in-JS
Although React projects can still be styled with CSS files, I ended up using the "styled components" package to... style my components.
With regular CSS, I frequently found myself dealing with unexpected side effects. For example, when I'd make a change to one selector, something else that I thought was completely unrelated would get affected too. Maybe I'm just bad at CSS? ¯\_(ツ)_/¯
However, with "styled components", I can keep my styles close to the components that they belong to, and it'll guarantee that the styles will only get applied to the components that I want. Thanks to this, I found that I had an easier time with styling overall. Also, the "cascading" nature of CSS works nicely with the hierarchical structure of your React Components.
Content Management with Gatsby
GraphQL
Gatsby also leverages GraphQL, which you can use to declaratively source the content for your site at build time. I've never used GraphQL before, and I was worried that it might take me some time to learn. However, I was able to quickly figure it out once I started messing around with it. Gatsby provides GraphiQL, an IDE that you can use to construct and test queries out against your content. I actually swapped it out for GraphQL Playground, which is another IDE with additional features. Once you get the results you want from the IDE, you can move those queries over to your Gatsby application code.
Image Handling
One of the things that I wanted to do on my previous web app (but ended up procrastinating) was to figure out how to handle images better. I originally threw all of my photos up on Cloudinary and then embedded their URLs into my site. This was fine, but I wanted to figure out how to better utilize their service in order to optimize my images for performance while also maintaining quality. Luckily, Gatsby provides highly configurable plugins that handle this out of the box.
Front-End Design
I'm not much of a designer, but I think my site's new design is much better than before. If you'd like to see what my previous site looked like, you can see screenshots of it in this post.
I've opted for a simpler design with more "blank" real estate and subdued use of colors (at least when compared to my previous site). I'm hoping that this provides less visual noise and more clarity on the intended focal points of the page.
Design Inspiration
I'd like to give credit where credit's due, so here are some of the personal sites/blogs that I used as inspiration.
- https://tobiasahlin.com/
- https://brianatiyeh.com/
- https://mtlynch.io/
- http://joelcalifa.com/
- https://brittanychiang.com/
- https://victorzhou.com/
- https://malikgabroun.com/
There were different aspects that I liked about each of them, and I borrowed (which could be a loose term here) some of their design ideas for my own site.
Given the level of my design abilities, I'm pretty happy with the look I was able to achieve. However, I'm always open to suggestions! If you have any thoughts or tips regarding the design, please feel free to send them to me.
Deploying with Netlify
I'm hosting my site with Netlify, which provides an incredible service that allows you to host your static content. Not only is it simple to use, but it also provides performance, scalability, and security by default. Best of all, as of May 2020 you can get all of this for free (within limits, of course).
CDN
Previously, I only had a single NodeJS application serving my site. This meant that all requests (even from visitors on the other side of the world) had to travel to my server to fetch my content. Not only could this be slow for distant visitors, but it also means that my application would be the bottleneck and single point of failure. One solution to this would be to distribute the static content to a global Content Delivery Network (CDN).
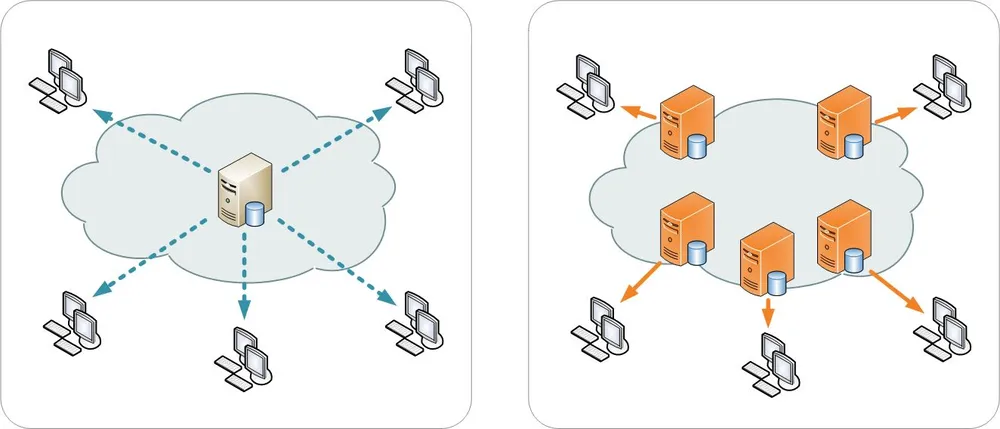 Single Server vs CDN - Image by Kanoha / CC BY-SA (https://creativecommons.org/licenses/by-sa/3.0)
Not only would this reduce the load on my web server, but it would also lead to faster page loads for all my visitors regardless of their location. I could've set up my previous web app to use a CDN as well, but it would've taken a decent amount of work to set this up correctly. Thankfully, Netlify provides this automatically with no hassle.
Thanks to fastorslow.com, I can even see the locations of where my site's static files are being served from in Netlify's global "Edge" network.
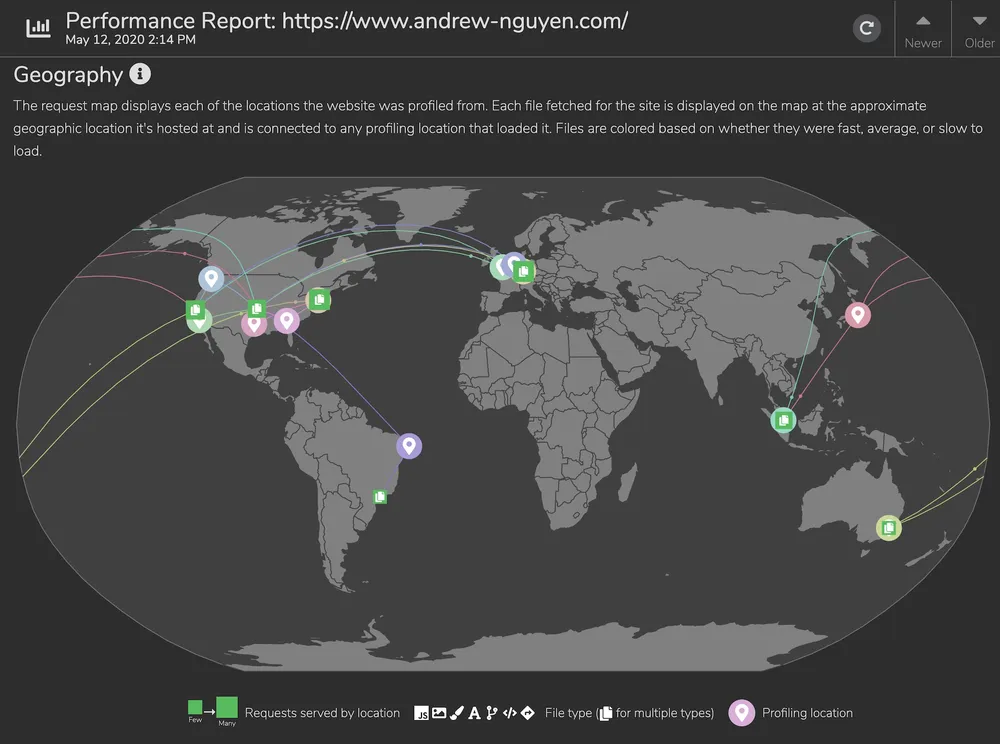 andrew-nguyen.com WORLDWIDE!
HTTPS
Netlify also provides free, automatic HTTPS on all sites, which includes automatic certificate creation and renewal. Not much else to say here!
Other Deployment Options
One thing to note is that Netlify isn't the only option to host your static site. There are plenty of different providers that you can choose from, such as GitHub Pages, Vercel, Firebase, or AWS S3 (+ CloudFront). I've personally enjoyed my experience with Netlify so far, but each of these platforms should be able to provide the same capabilities with varying amounts of upfront work. In fact, Gatsby even has a doc on how to deploy your static site to different providers.
Final Thoughts & Performance
I'm pretty happy with how my site turned out! I think it's much better than its predecessor from both an aesthetic and technical standpoint.
Before I end this post, here are some more performance metrics that I was able to gather, which really highlights the capabilities that an SSG (like Gatsby) and a CDN can provide for your site. Unfortunately, I wasn't able to gather the same metrics for my old web app for comparison, but it's probably safe to say that it wouldn't have come close to these numbers.
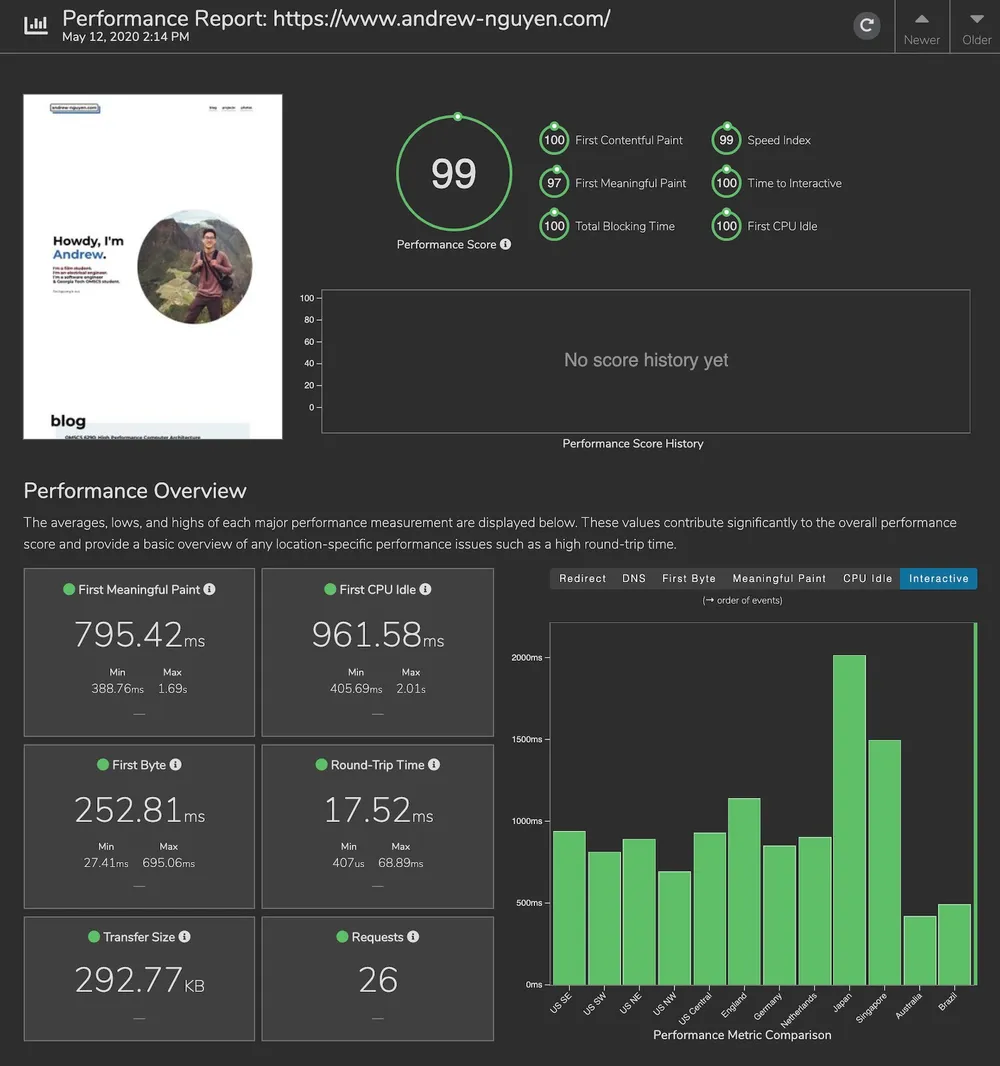 Performance Overview from FastOrSlow.com
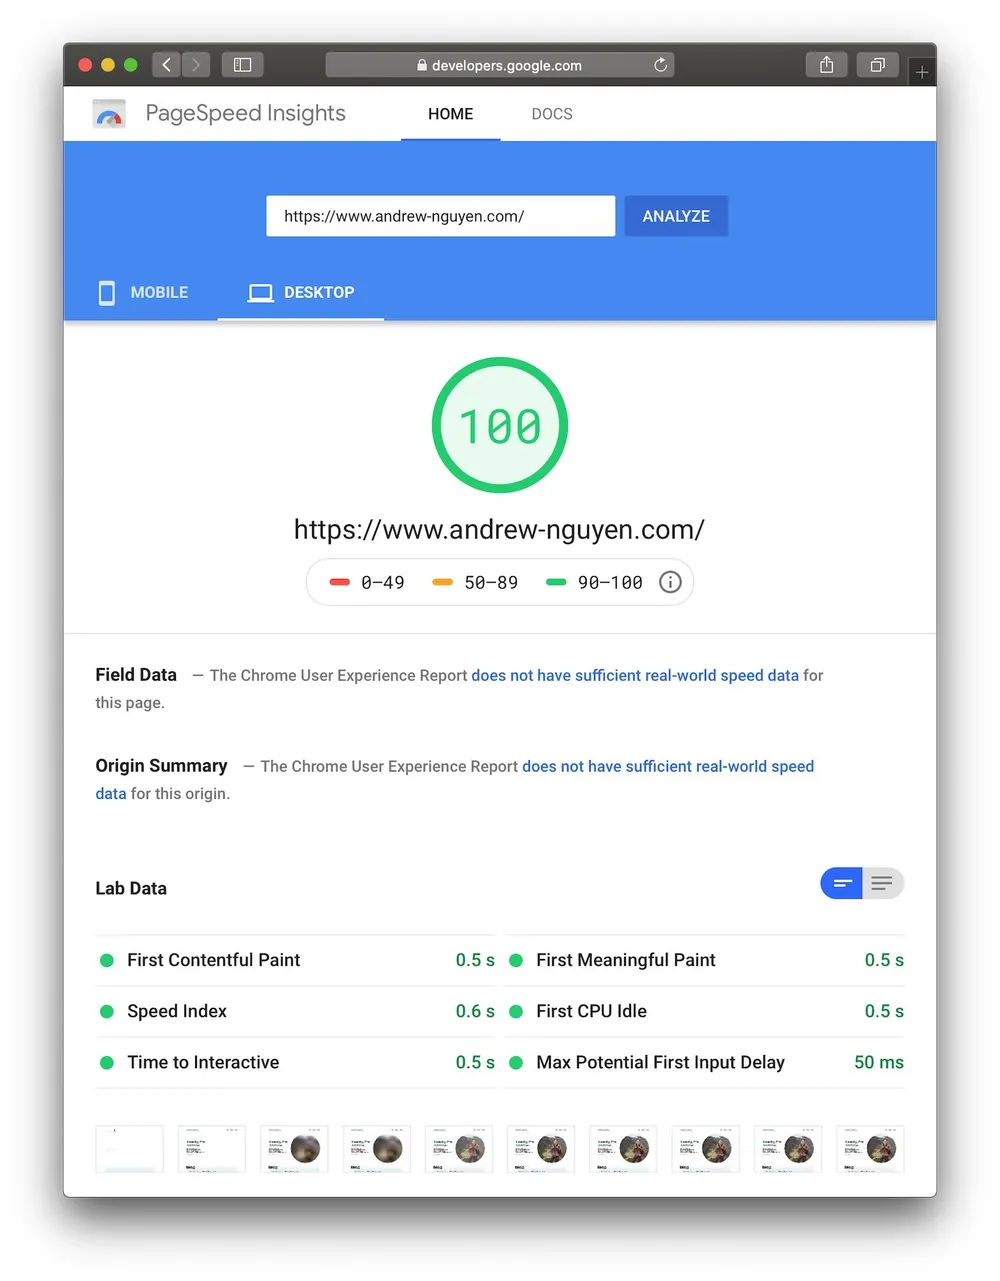 Performance Overview from PageSpeed Insight (Desktop)
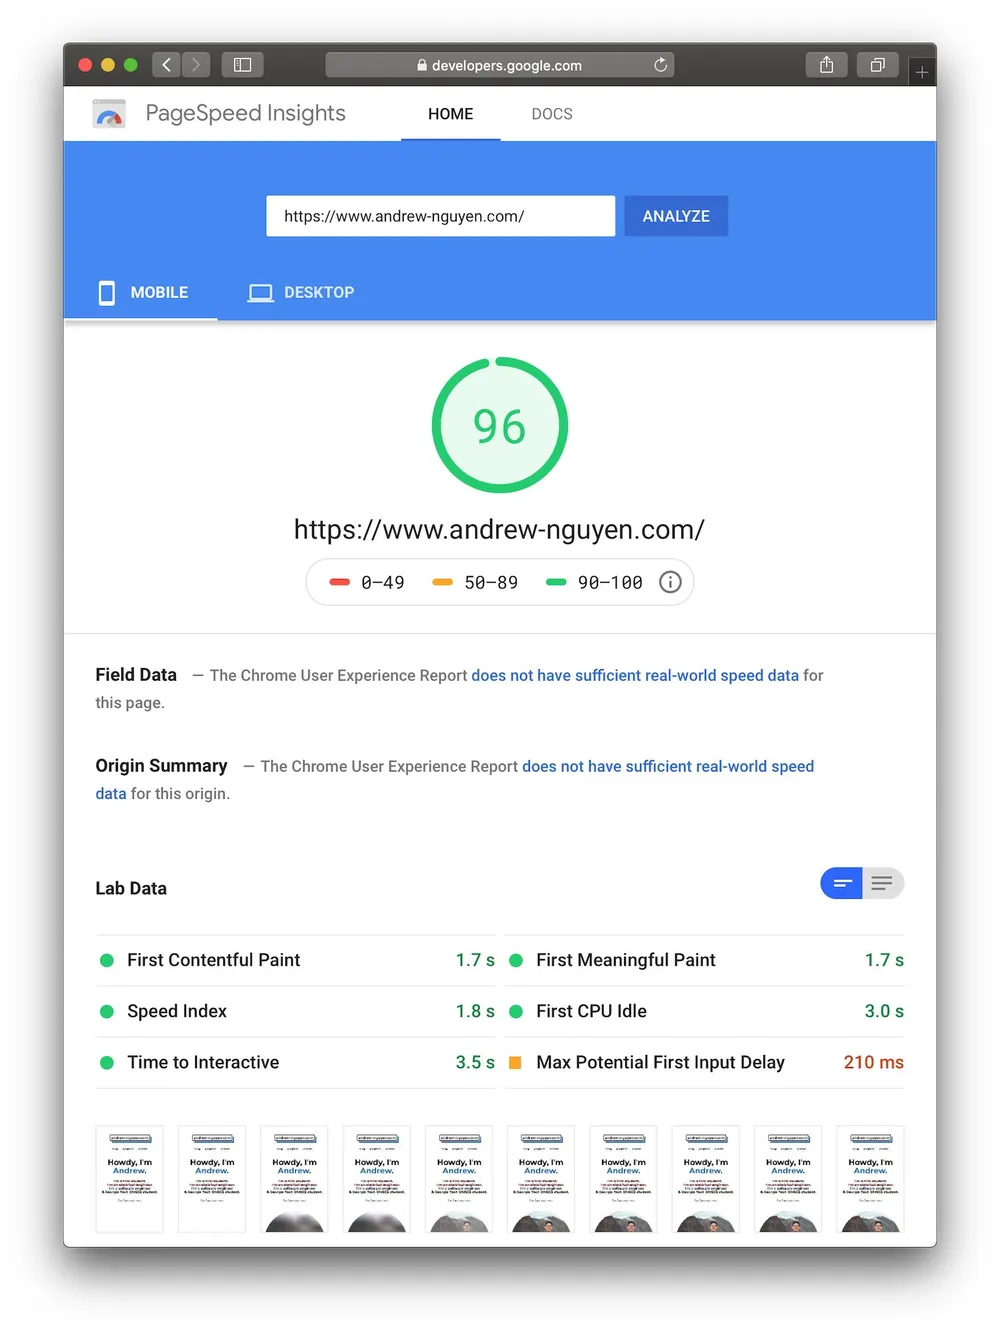 Performance Overview from PageSpeed Insight (Mobile)
Best of all, this costs a fraction of what I had to pay to run my old web app! Thanks for reading :)